What File Format Do I Need to Upload to Docusign Template
The DocuSign integration allows y'all to utilize either Workbooks PDFs or DocuSign Templates. This commodity covers how to setup a DocuSign Template.
Creating a Template in DocuSign
Before y'all can configure the integration in Workbooks, you will need to upload a blank Template within DocuSign. Login to your DocuSign Account to practice so.
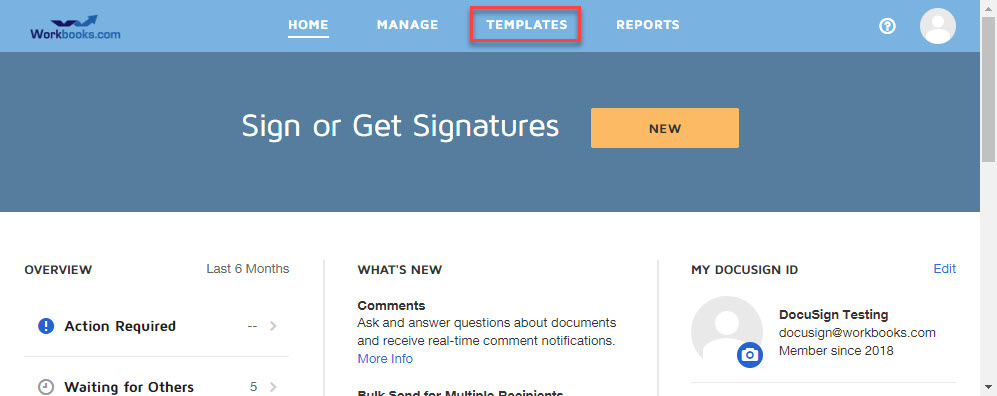
In one case logged in, select the Templates option from the toolbar at the acme of the page.
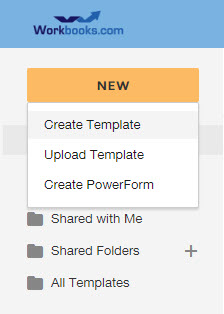
Select the New button at the pinnacle of the toolbar on the left side of the screen.
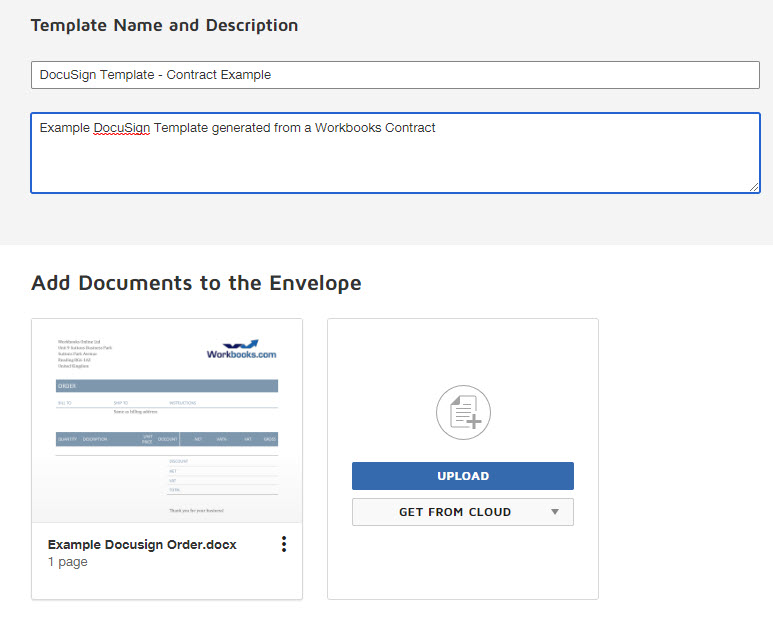
In the new template, set the following fields:
- Template Name: This is the name that volition announced in the DocuSign Plugin inside Workbooks when setting up a new document configuration
- Template Description: Provide a brief description then it's clear how this template is existence used.
Finally, upload the document that volition form the basis of your Template. Documents can be uploaded from your figurer or uploaded from a number of file sharing sites.
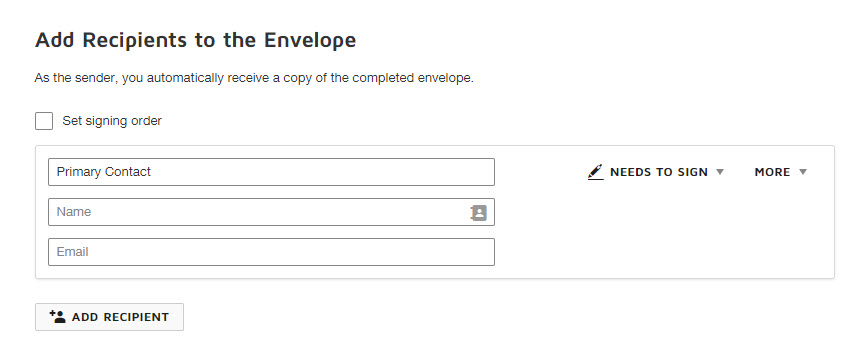
Next, you volition demand to define placeholders for Template Roles inside this Template. When the integration generates an envelope using this template, the Template Roles are matched with Workbooks Relationships, and the Recipient automatically added to each role specified in the Template. The Role entered here must be an available human relationship value that has been configured in Workbooks. For each record blazon, the values available differ:
For Transaction Documents, the picklist can be amended in Workbooks under Configuration > Customisation > Picklists. Filter by Name for the "Document People Roles" or "Opportunity Contact Roles" (if using Opportunities) picklists to see bachelor values.
In this example, add one recipient, where the Role is fix to Principal Contact with "Needs to Sign" as the signing action. Multiple recipients with either the Needs to Sign (Signer) or "Receives a Copy" (CC) signing action can exist added as required. More than information on Templates and Template Roles in DocuSign can be found hither. You will need to know the Roles that accept been configured later in the setup, and so leave this window open.
NOTE: The DocuSign integration merely supports Signer ("Needs to sign") and CC ("Receives a copy") signing actions. Other actions are available in DocuSign, but volition not be added automatically when an envelope is generated.
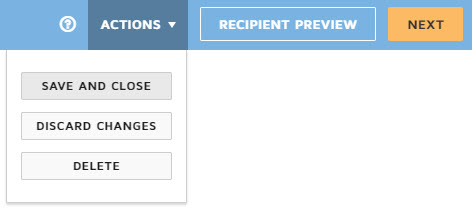
As a final step, save the Template past clicking Actions > Save and Close, otherwise it will not be available within Workbooks to complete the next steps.
Notation: It is important to ensure that no DocuSign tabs are added at this point. There are some additional steps required in Workbooks prior to doing this.
Set up upwards the Template in Workbooks
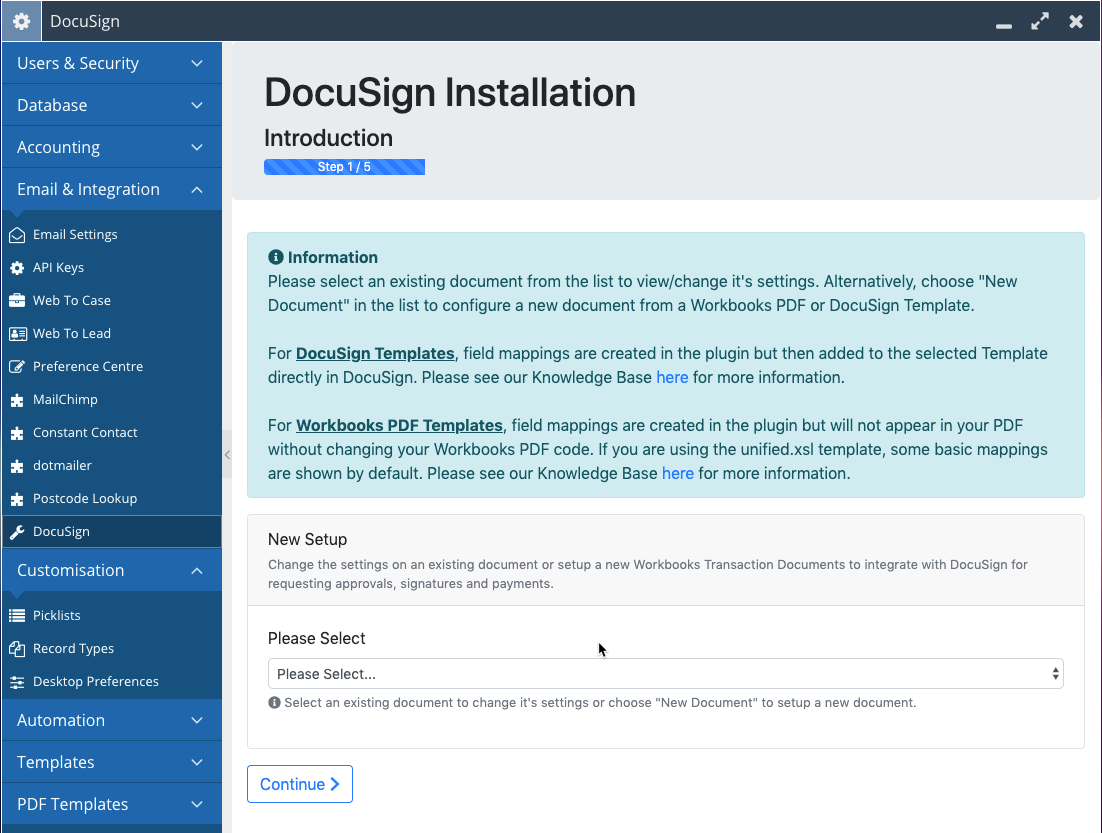
Return to Workbooks to configure the DocuSign Integration with your new Template. The DocuSign card can be accessed from Kickoff > Configuration > Email & Integration.
Plugin - Step 1 - Introduction
On the first page, select New Certificate and so Keep.If this is the offset document that yous have configured, so you will taken straight to Stride 2 below.
Plugin - Stride 2 - Settings
Work through the Plugin settings, configuring them to your requirements as needed. See hither for further data on each setting. At that place are a few of import settings that must be configured every bit detailed below for the integration to work with a DocuSign Template:
- Select DocuSign Template in the Integration Type picklist
- Select the DocuSign Template created in Stage i of this guide for the DocuSign Template picklist
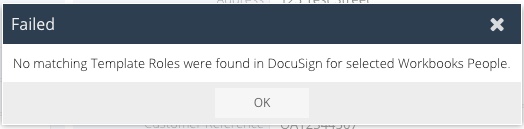
- Ensure that you configure "Which human relationship roles should be used as Signers" and "CC Recipients" equally per the Template Roles configured in DocuSign e.g. if y'all created a Template Function of Primary Contact in DocuSign and set this role equally the Signer, ensure yous select Principal Contact in the "Which relationship roles should be used as Signers" in the plugin.
- NOTE: If you do not choose the same Relationship here as you have configured on your DocuSign Template, the Process Button will mistake with the following message:
Click "Continue" when yous are happy with the settings.
Plugin - Step three - Configure AutoPlace Mappings
This step allows you to configure fields from your selected Workbooks record type to populate fields on the DocuSign Template when a new envelope is generated. The integration has the capability to default the field values on the DocuSign document to the value held within Workbooks. When the document is signed, the updated information can be reflected back in Workbooks.
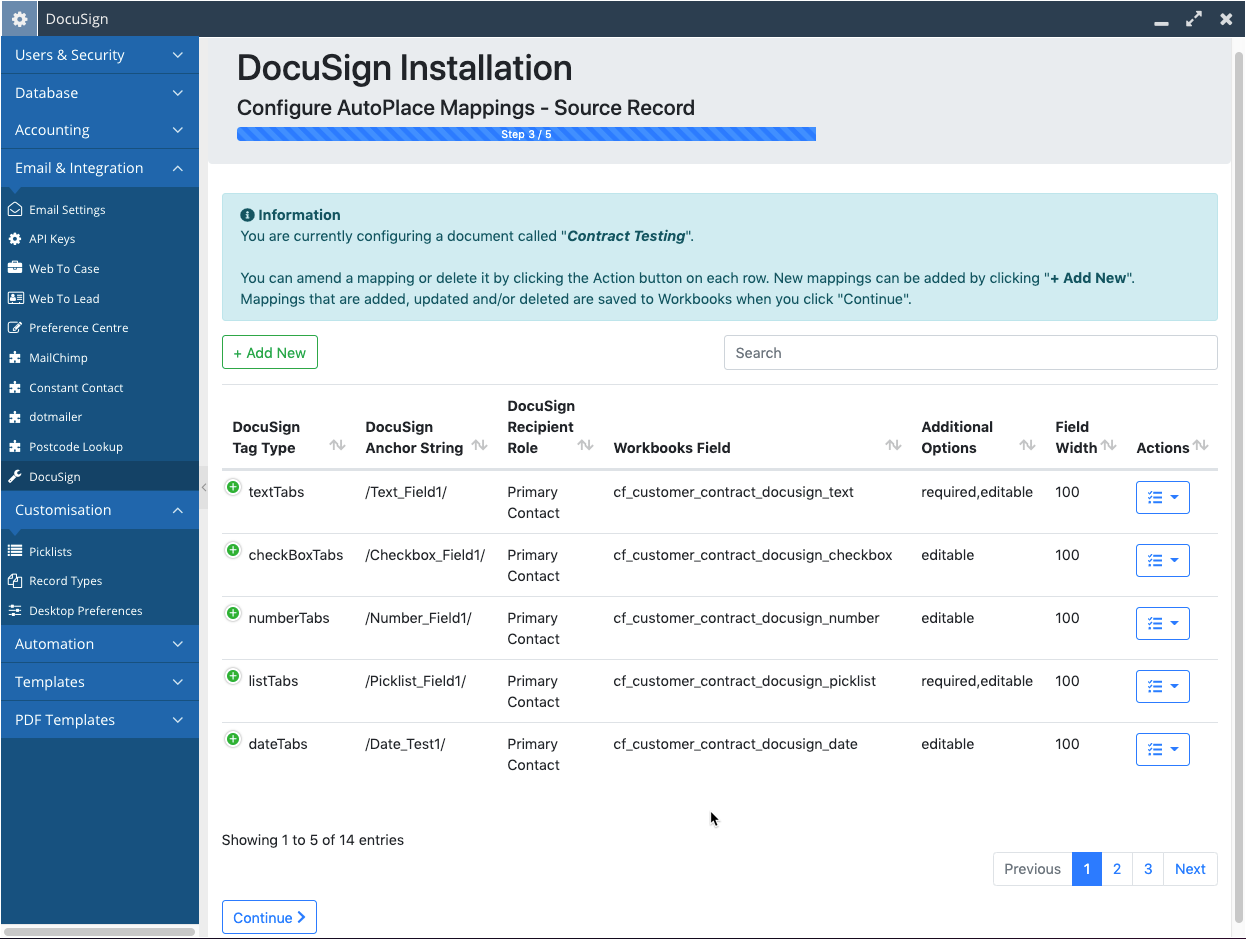
To set a new Mapping select the Add together New push button. In the dialogue box, populate the following information to create a new field mapping
- Docusign Tag Type: The DocuSign Field data type. The Tag Blazon tin can affect how data is displayed on the Document, more than information tin be constitute on DocuSign'southward Support Site. Based on the Workbooks Custom Field blazon, nosotros recommend reviewing this folio which details the best blazon to use for the integration.
- For DocuSign Tags that cannot be prepare to Workbooks values such as Signatures, Recipient Names, Date Signed etc, you should add together these directly to the DocuSign Template in the following steps. They do not need to exist added hither.
- DocuSign Anchor String: This defines where on the document the tag volition announced if the tag is plant past DocuSign in your template. Come across here for DocuSign's help folio on Anchors. This is optional and can be left bare if your Template does non have Anchor Tags specified. Fields tin manually placed if this is the case.
- Workbooks Field: Select the field which volition be used to initially pull through a value to the DocuSign Field. This field tin can and then be updated if the field is made editable in DocuSign
- Multi-select picklists are not supported in DocuSign and therefore, if configured in Workbooks, do non testify in this list
- Picklist selections may break if they incorporate a semi-colon in the value, due to a limitation in DocuSign
Notation: In the following steps, Field Mappings are added to your DocuSign Template. At this indicate, y'all tin configure the field to be required, readonly, change font appearance etc directly in the DocuSign Template UI.
Once you have added a mapping, it tin be edited or deleted using the Deportment button beside each row. five mappings are shown per page. A search feature is provided if you lot have several mappings - you tin can search by DocuSign tag proper noun, DocuSign field type or Workbooks field name. Mappings are not stored until you lot click Continue.
Plugin - Stride iv - Related Record Mappings
If you turned on the Update Related Records setting in Stride one, and so a 2nd Mappings screen is shown. This screen allows you lot to configure mappings for fields that are on records related to the source record via a DLI field. For instance, you may take a Contact DLI which relates a Person to your source document.
The process for adding mappings is the same equally Step three. However, there are 2 slightly different options:
- Workbooks DLI Field: This is a list of all DLIs on the selected record type set in Step i
- Workbooks Field: A DLI is driven from a study based on a record blazon. Once y'all select a DLI, this listing will exist populated with the fields from that tape type.
- For case, if you have a Person DLI, the report will exist based on People and thus the fields shown here will be for People records.
- This feature only allows you to drill through to one record. Yous cannot afterward drill through to another tape related to the first.
Once again mappings can be edited or deleted using the Actions menu. They can also be searched. Changes will not be practical until you click Go along.
Plugin - Step 5 - Complete
The DocuSign document is gear up to be generated. Yet, you will now demand to add a Process Button to the appropriate Form Layouts so y'all can send the certificate out. This is documented fully on this folio: hither.
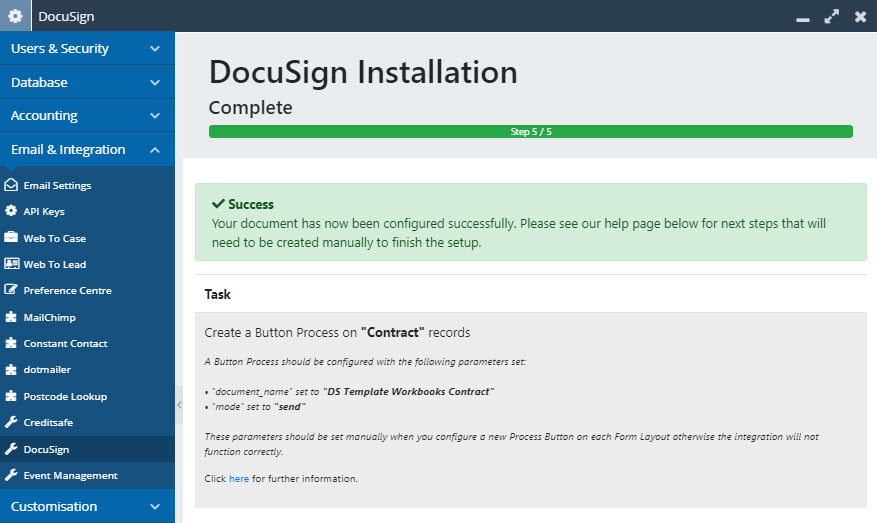
Once you have completed the configuration screen, information technology tin can take upward to one hour for the mappings to synchronise to DocuSign. Field mappings are synced to DocuSign using the DocuSign Maintain Fields Scheduled Process. If you have created a lot of mappings, information technology may take several hours to sync - a maximum of 100 fields per hour are created to avoid DocuSign API Limits.
Afterward the terminal page is complete, you will need to configure a Process Push button as explained hither.
Configuring DocuSign Fields
Dorsum in DocuSign, select the Template that yous configured earlier, then clickEdit. In Edit mode, yous tin brand whatsoever last amendments to the Template. ClickSide by side to generate a Template mockup. From here, you can add the DocuSign Fields to your Template.
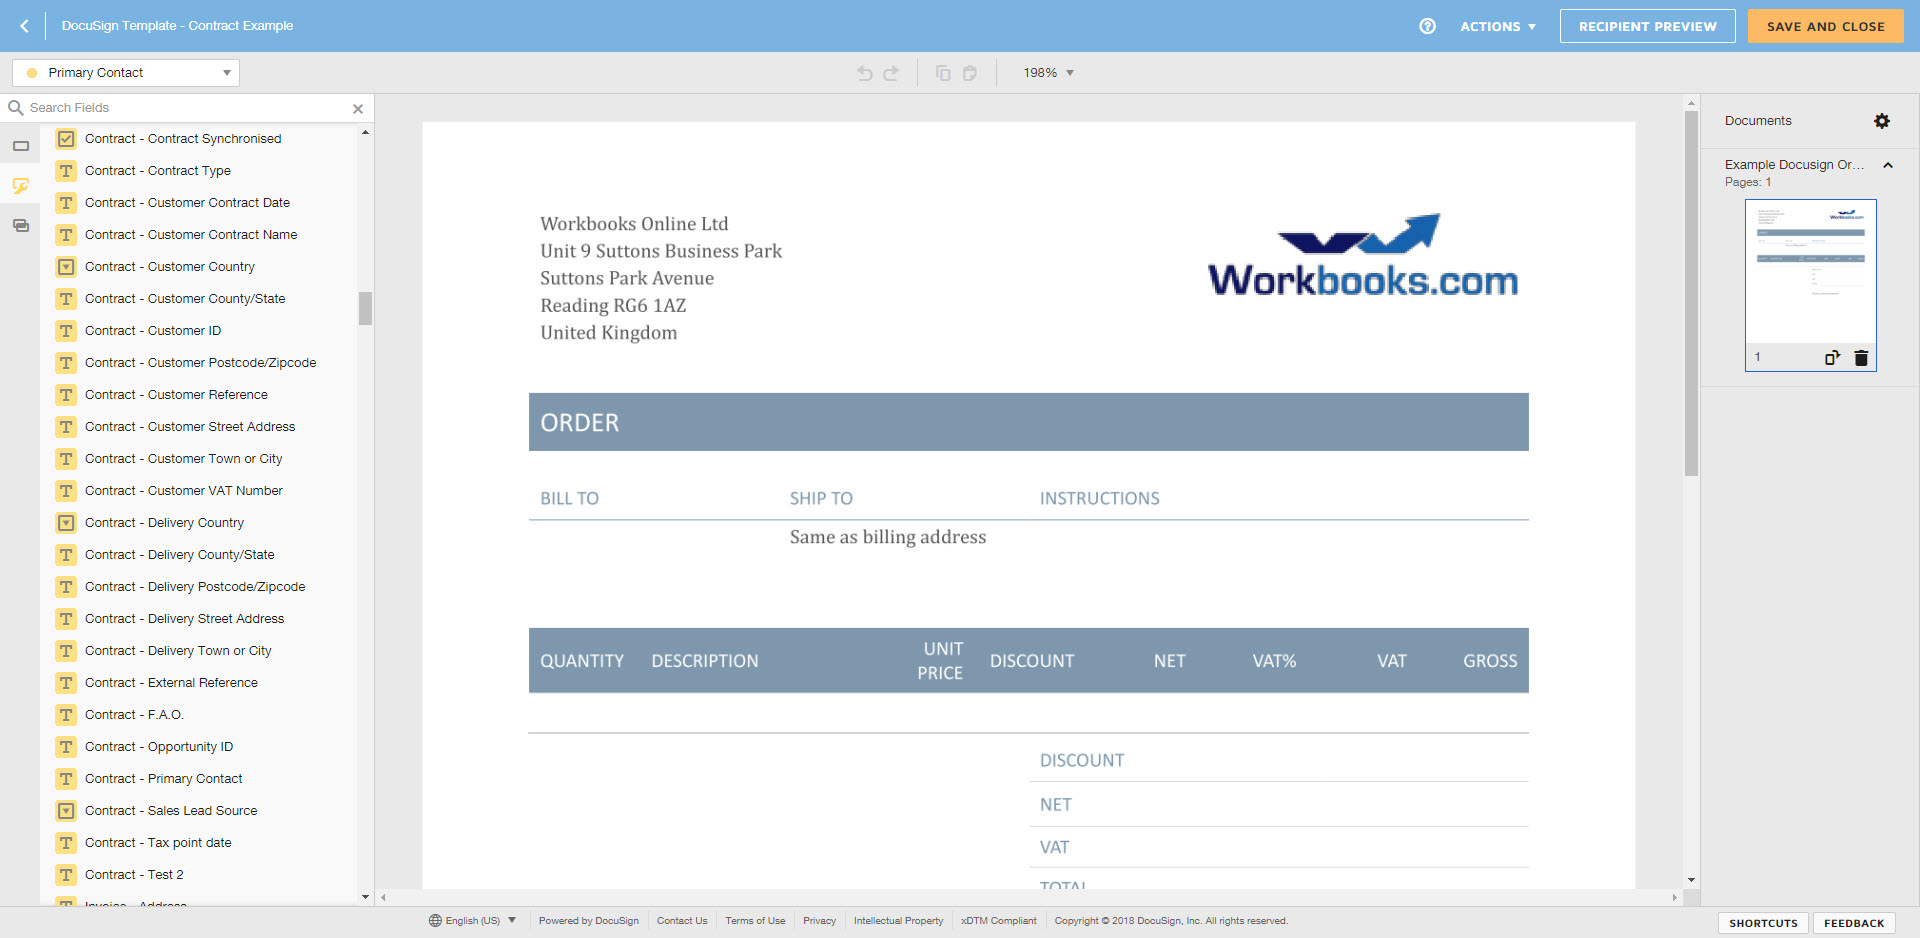
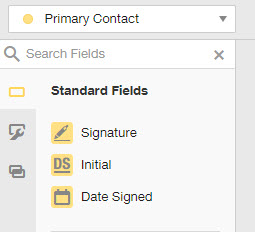
Nether Standard Fields, you can should add any fields where a Workbooks Field Mapping was not created such every bit for Signatures, Date Signed, Recipient Name etc. Add these to your Template by dragging and dropping them into the relevant location on your Template. If you take multiple Template Roles, change the recipient in the top left, before adding the field to setup who can populate each field:
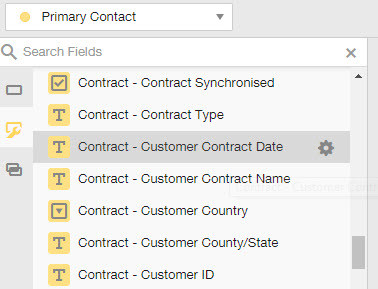
In one case Workbooks Fields have synced, you volition run across a DocuSign Custom Field under the Custom Field section inside the Template. Each field is prefixed with the Tape Type and and then has the Field Label and so you can easily identify which fields to include in your certificate. For fields that are linked to related records, they will accept "DLI" in the field label, and as well the respective Workbooks DLI proper name so yous tin hands identify fields. These fields tin also be dragged and dropped onto your template. If you specified an Anchor String when you created the mapping, so DocuSign will attempt to place the field at all occurrences of that ballast.
Custom Fields are automatically mapped back to the respective Workbooks field when the document is signed. Y'all should not create any new Custom Fields directly in DocuSign as these will not map dorsum to Workbooks.
Once you have added the Custom Field to your DocuSign Template, configure the settings for that field directly within the properties console of DocuSign, such equally making information technology Read But, Required, irresolute the font etc.
NOTE: Do not modify the Field Characterization or Tooltip in DocuSign otherwise the field will not sync back to Workbooks when a document is signed.
One time this step is complete, Save and Close. Yous can now generate a new DocuSign envelope for signature using this Template.
wattssishomistend.blogspot.com
Source: https://www.workbooks.com/help/creating-document-docusign-template
0 Response to "What File Format Do I Need to Upload to Docusign Template"
Post a Comment